How to Maintain Your Welding Equipment for Longevity
Quick answer
Maintain welding equipment by separating user-safe checks from service work: inspect leads, guns, hoses, gas flow, feed rolls, consumables, fans, storage conditions, and logs before each job. Stop using damaged cables, leaking gas equipment, overheating machines, or gear involved in a shock, fire, or regulator incident until it is repaired or inspected.
Common questions
- What welding maintenance should be done before every use?
- Check cable insulation, lead connections, ground clamp contact, gun or torch consumables, gas hose condition, cylinder/regulator condition, ventilation, and the surrounding work area before striking an arc.
- When should a welder stop using equipment instead of repairing it during a job?
- Stop when cables expose conductors, the machine overheats repeatedly, gas fittings leak, a regulator or cylinder is damaged, the fan fails, or electrical components smell hot or look burned.
Source note: Reviewed July 2026 against OSHA welding and cutting requirements, AWS welding PPE and safety references, and manufacturer MIG gun maintenance guidance. Employer procedures, equipment manuals, and qualified repair technicians control shop work.
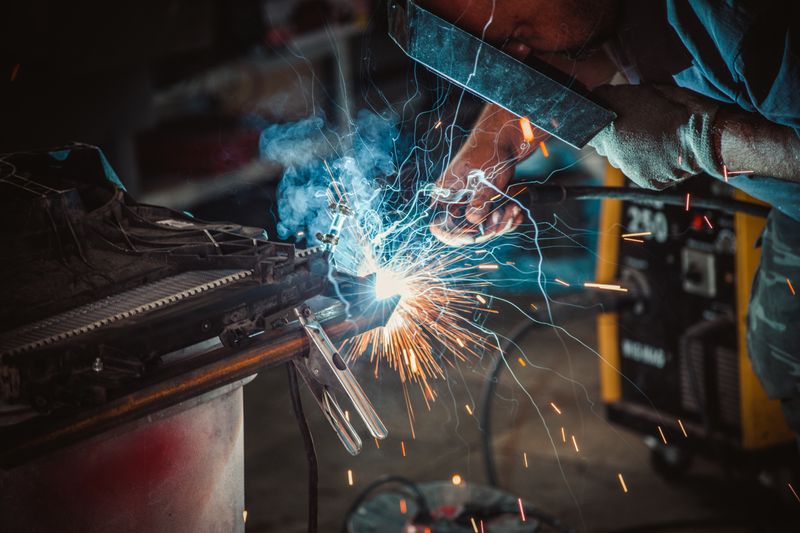
A welding machine is only useful when the whole setup is reliable: power source, leads, ground clamp, gun or torch, gas supply, ventilation, consumables, and storage. Maintenance is not just about making a machine last longer. It is how you catch damaged insulation, poor shielding, clogged liners, unstable arcs, and gas problems before they turn into bad welds or unsafe work.
Whether you are running a shop full of production welders or maintaining a single machine in your garage, this guide covers the maintenance routines that keep your equipment running at its best.
Maintenance Triage: Do, Defer, or Stop
Use this matrix before you start cleaning panels or replacing consumables.
| Finding | What it usually means | Next action |
|---|---|---|
| Light nozzle spatter, worn contact tip, dirty drive rolls | Normal consumable wear | Clean or replace before the next weld |
| Wire nests, surging feed, bird-nesting, wire dust in feeder | Liner, drive-roll tension, tip size, or wire storage problem | Stop and correct feed path before troubleshooting settings |
| Cable insulation cracked, cut, melted, or showing conductor | Electrical shock and fire hazard | Remove from service; replace cable or have it repaired correctly |
| Gas fitting bubbles during leak check | Shielding loss and compressed-gas hazard | Close cylinder, ventilate, repair fitting before welding |
| Fan noisy, stopped, or machine trips thermal overload repeatedly | Cooling problem or blocked airflow | Stop welding until cooling path and fan are checked |
| Regulator dropped, gauge damaged, or cylinder valve questionable | Compressed-gas equipment risk | Do not use; follow supplier or shop procedure |
OSHA’s welding rules emphasize ventilation, fire prevention, PPE, and safe handling of gas equipment. Keep those controls in the maintenance routine rather than treating them as separate paperwork. Start with OSHA 1910.252 for general welding/cutting requirements and OSHA 1910.253 for oxygen-fuel gas equipment. AWS also publishes welding PPE and safety references; its PPE fact sheet points back to OSHA, NFPA 51B, and AWS eye/face and respiratory resources.
Why Equipment Maintenance Matters
Consistent maintenance provides three key benefits:
- Consistent weld quality — Clean contacts, smooth wire feeding, and stable gas flow all contribute to reliable, repeatable welds.
- Reduced downtime — Most welding equipment failures are preventable. A cracked liner or worn contact tip is a five-minute, five-dollar fix if caught during maintenance — or a production-stopping headache if it fails mid-job.
- Longer useful service life — Welding machines that are kept clean, dry, and serviced according to the manual are less likely to fail from preventable heat, dust, moisture, or connection problems.
Daily Maintenance (Before Each Use)
Visual Inspection
Take two minutes before you start welding to inspect:
- Power cables for cuts, abrasion, or exposed conductors
- Welding leads and ground clamp cables for damage
- Gas hoses for cracks, kinks, or leaks
- Connections at the machine, torch, and ground clamp for tightness
Damaged cables are not just a maintenance issue — they are a safety hazard. Replace any cable with visible conductor exposure immediately.
Check Gas Flow
Turn on your shielding gas and check the flow rate at the nozzle. A flow meter or regulator gauge should read in your normal operating range (typically 20–35 CFH for MIG, 15–25 CFH for TIG). If the flow seems low or inconsistent, check for leaks at the fittings, hose connections, and nozzle.
A simple gas leak detection solution applied to fittings will bubble at any leak point.
Clean the Work Area
Clamp the ground clamp to a clean, bare-metal surface. Paint, rust, scale, and corrosion at the ground connection create resistance that affects arc quality and can damage the clamp over time.
Inspect Consumables
Check your contact tip (MIG), tungsten (TIG), or electrode holder (stick) for wear. A worn contact tip causes erratic wire feeding and poor arc stability. A contaminated tungsten produces an unstable arc and can introduce impurities into the weld.
Weekly Maintenance
MIG Gun Maintenance
The MIG gun is the component that requires the most frequent attention.
Clean or replace the contact tip. Contact tips wear from the electrical contact with the wire and from spatter buildup. A brass contact tip should be replaced when the bore becomes oval-shaped or when the wire does not feed smoothly through it. Expect to replace tips every 10–40 hours of arc time depending on application.
Check and clean the nozzle. Spatter accumulates inside the nozzle and restricts gas flow. Use nozzle gel or anti-spatter spray to reduce buildup, and clean the nozzle with pliers or a reamer when spatter accumulates.
Inspect the liner. The liner guides the wire from the feed rolls through the gun. Over time, it accumulates dust, wire debris, and becomes grooved from wire friction. If wire feeding becomes erratic despite clean rollers and a new contact tip, the liner is likely the culprit.
To check the liner, remove the contact tip and nozzle, then feed a piece of wire through by hand. If you feel resistance or catching, replace the liner. A MIG gun liner replacement kit is inexpensive and takes about 15 minutes to install.
MIG gun makers treat liners, tips, nozzles, and diffusers as wear items. ABICOR BINZEL’s MIG gun maintenance guidance is useful because it separates wire-liner problems from tip, drive-roll, and tension problems instead of blaming every feeding issue on machine settings.
Clean the feed rollers. Remove the wire, open the tension arm, and blow out the drive assembly with compressed air. Inspect the rollers for grooves or wear. V-groove rollers for hard wire and knurled rollers for flux-cored should be replaced when the groove becomes visibly worn.
TIG Torch Maintenance
Inspect the tungsten. Remove the tungsten electrode and examine it. A properly used tungsten should have a clean, rounded (for AC aluminum) or pointed (for DC steel) tip. Contaminated tungsten shows discoloration, balling, or a blackened tip. Resharpen or replace as needed.
Check the collet and collet body. The collet grips the tungsten. If the tungsten slips during welding, the collet or collet body may be worn. These are inexpensive consumables that should be replaced when they no longer hold the tungsten securely.
Inspect the ceramic cup (nozzle). Cracked or chipped ceramic cups disrupt shielding gas coverage and can contaminate the weld. Replace cups that show any damage.
Clean the gas lens. If your TIG torch uses a gas lens (and it should for most applications), remove it and check the mesh screen for contamination. A clogged gas lens restricts gas flow and causes poor shielding.
Stick Welding Maintenance
Stick welding equipment is simpler but still needs care.
Clean the electrode holder. The jaws of the stinger should grip electrodes firmly and make clean electrical contact. Clean the jaws with a file or abrasive pad to remove oxidation and spatter buildup. Replace the jaw inserts when they become deeply grooved.
Inspect the ground clamp. A weak ground connection causes erratic arcs and poor starts. Clean the clamp jaws and ensure the cable connection at the clamp is tight and corrosion-free.
Check cable connections. The cable connections at both the electrode holder and the machine terminals should be tight. Loose connections create resistance, generate heat, and waste power.
Monthly Maintenance
Clean the Inside of the Machine
Dust and metal dust are the enemies of welding electronics. Dust accumulation on circuit boards, fan blades, and heat sinks reduces cooling efficiency and can cause overheating and component failure.
How to clean the machine interior:
- Unplug the machine and disconnect it from all power sources
- Open the side panel or access cover
- Use low-pressure compressed air (30 PSI or less) to blow out dust from the circuit boards, transformer, fan, and all interior surfaces
- Do not use high pressure — it can force dust deeper into components
- Inspect for any signs of overheating, loose wires, or corrosion
- Close the panel and secure all fasteners
Perform this monthly in a shop environment, or more frequently if you weld in dusty conditions.
Check Electrical Connections
Vibration from daily use can loosen internal connections over time. With the machine unplugged, check the terminal board connections, transformer tap connections (on older machines), and any plug-in connectors. Tighten any that are loose.
Test the Fan
The cooling fan is critical for maintaining the machine’s duty cycle. A failed fan leads to rapid overheating. Run the machine and verify the fan operates smoothly without unusual noise, vibration, or bearing squeal. Replace fans that show signs of bearing wear — they are inexpensive compared to the power board they protect.
Inspect and Lubricate Wire Feed Mechanism (MIG)
Remove the wire feed rollers and clean the feed assembly. Apply a small amount of light machine oil or dry lubricant to any pivot points in the tension arm mechanism. Do not get lubricant on the rollers themselves or the wire path.
Annual Maintenance
Comprehensive Machine Service
Once a year, perform a thorough inspection:
- Test the machine’s output voltage and current against specifications using a calibrated meter
- Inspect all PCBs for discoloration, bulging capacitors, or cold solder joints
- Check the condition of the power switch, circuit breaker, and any fuses
- Inspect the power cord and plug for damage
- Verify that all safety features (thermal overload, voltage reduction devices) function correctly
- Replace any worn or deteriorated labels and warning placards
Cable and Hose Replacement
Welding cables degrade over time, even with careful use. The copper strands work-harden from flexing, and the insulation becomes brittle from heat and UV exposure. Plan to replace heavily used cables every 3–5 years, or sooner if you notice stiffness, cracking, or reduced flexibility.
A quality welding cable replacement kit with pre-terminated ends makes cable replacement straightforward.
Regulator and Flowmeter Service
Shielding gas regulators should be tested annually for accuracy. If your flow readings seem inconsistent or the gauge needle drifts, have the regulator serviced or replaced. A malfunctioning regulator wastes expensive gas and can provide inadequate shielding.
Storage Best Practices
How you store your equipment when not in use matters as much as active maintenance.
- Store machines in a dry, climate-controlled space when possible. Moisture is the primary enemy of electronic components.
- Cover machines with a breathable cover to keep dust out while allowing any condensation to evaporate.
- Remove wire from MIG guns if the machine will sit unused for more than a week. Wire left in the liner attracts moisture and can cause rust that contaminates the liner.
- Release tension on MIG feed rollers during storage to prevent flat spots on the rollers and compression of the liner.
- Store electrodes properly. Keep low-hydrogen rods in a rod oven. Store other electrodes in sealed containers in a dry location.
Maintenance Log
Keep a simple log for each piece of equipment documenting maintenance performed, consumables replaced, and any issues noted. This helps you track patterns, plan ahead for replacement parts, and provides documentation for warranty claims.
A dedicated equipment maintenance logbook or a simple spreadsheet both work well.
Use one row per machine or torch service event:
| Date | Machine / gun | Hours or wire used | What was checked | Parts changed | Safety stop found? | Next review |
|---|---|---|---|---|---|---|
| 2026-07-24 | MIG #2 / 15 ft gun | 10 lb ER70S-6 | Tip, nozzle, liner feel, drive rolls, gas leak check | Contact tip | No | Next wire spool |
| 2026-07-24 | TIG torch | 3 hours aluminum | Cup, collet, gas lens, hose, tungsten | Cup and tungsten | No | Weekly |
This is also where job-cost planning connects to maintenance. If contact tips, liners, gloves, lenses, gas, and downtime are recurring costs, include them in the assumptions you use in the welding cost calculator and the how to calculate welding costs guide.
Key Takeaways
Welding equipment maintenance is not complicated, but it requires consistency. Daily inspections take two minutes and catch problems early. Weekly consumable replacement and cleaning keeps your welds consistent. Monthly deep cleaning extends machine life. Annual comprehensive service prevents catastrophic failures. The small investment of time and money in maintenance pays for itself many times over in avoided downtime, repair costs, and replacement equipment.
Related Articles
Shielding gas systems require their own maintenance attention — the understanding welding shielding gases guide covers regulator service, leak detection, and cylinder management that directly affects your maintenance routine. Well-maintained equipment produces fewer weld defects, but when defects do occur, the common welding defects and how to fix them guide helps you diagnose whether the cause is equipment or technique. If you are building a welding business, controlled maintenance costs feed directly into your bids — see how to calculate welding costs for a framework that accounts for repair and equipment depreciation.
Keep maintenance tied to safety, settings, and job cost
These resources connect equipment care with gas handling, consumables, defects, and realistic welding estimates.
- Welding equipment maintenance log
Track leads, liners, tips, gas fittings, PPE, consumables, symptoms, and repair follow-up.
- Weld defect glossary worksheet
Document porosity, undercut, feeding issues, and likely equipment causes during practice.
- Understanding shielding gases
Check regulator, flow, gas mix, and leak questions that affect maintenance routines.
- Welding consumables guide
Track tips, nozzles, lenses, electrodes, wire, abrasives, and replacement intervals.
- Common welding defects
Separate equipment-caused defects from setup, technique, and base-metal problems.
- How to calculate welding costs
Build maintenance parts, downtime, and replacement tools into pricing assumptions.

The Welder's Guide Editorial Team
Independent trade-focused editorial team