Why is my TIG tungsten turning black or gray?
Quick answer
A TIG tungsten that turns gray, blue, or black is usually oxidizing because air reaches it while it is hot. First identify whether the color appears during the arc or after shutdown. Then return to the exact machine and torch manual, and isolate post-flow, torch position, gas delivery, drafts, torch assembly, polarity/current, and contact contamination one condition at a time.
Common questions
- Why is my TIG tungsten turning black?
- Blackening usually means the hot tungsten has lost effective shielding or picked up contamination. Note whether it darkens during the arc or only after the arc stops, then test post-flow and torch position before changing gas delivery, torch parts, or electrical settings.
- Why is my tungsten turning grey even when I do not dip it?
- A gray or frosted surface can result from oxidation without contact. Short or interrupted post-flow, moving the torch away too soon, drafts, a disturbed shielding envelope, a torch leak, excessive stickout, or a mismatched polarity/current setup are possible causes.
- Should I increase argon flow when TIG tungsten turns black?
- Not automatically. Too little flow can lose coverage, while excessive flow can create turbulence and draw in air. Restore the value in the exact machine, torch, or approved welding procedure, then verify actual delivery and change only one condition at a time.
- Can I keep welding with discolored tungsten?
- Stop and inspect it. Recondition or replace the electrode as its manufacturer and the welding procedure require, correct the cause, and prove the setup on representative practice material. Appearance alone cannot qualify a production weld.
Source note: Reviewed September 11, 2026 against current Miller GTAW troubleshooting material, the Miller Maxstar 210 and Lincoln Square Wave TIG 200 manuals, and OSHA welding requirements. The exact power-source and torch manuals, gas data, WPS, and site safety program control a specific setup.
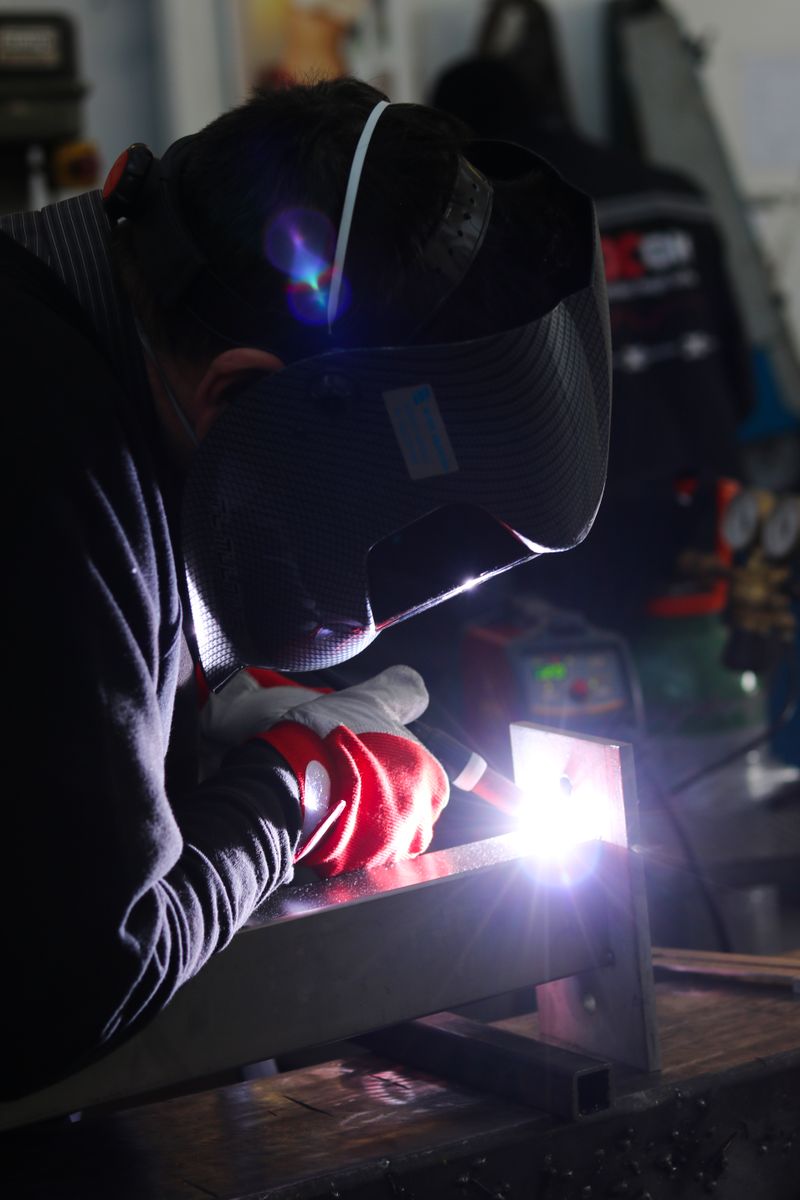
Why is my TIG tungsten turning black or gray?
A TIG tungsten that turns gray, blue, or black is usually being exposed to air while it is hot, or it has picked up material from the puddle or filler rod. The most useful clue is timing: did the color appear during the arc, or did a bright electrode darken after you released the control?
Do not immediately turn up the gas, lengthen post-flow, change tungsten, and alter amperage together. Return to the documented setup, observe one weld cycle, and change one condition at a time.
Match the symptom to the first check
| What you observe | What it suggests | First check |
|---|---|---|
| Tungsten darkens after shutdown | Hot electrode lost shielding during cooling | Actual post-flow and torch position |
| Exposed tungsten turns dull or dark while the arc is active | Shielding envelope is disrupted | Gas delivery, drafts, torch angle, stickout, cup, and front-end assembly |
| A metallic lump follows a dip or filler touch | Direct contact contamination | Stop; recondition or replace the electrode |
| Tip swells, retreats, splits, or melts during the arc | Electrical or thermal mismatch | Polarity, AC balance, peak current, electrode type/diameter, and cooling |
| Weld is sooty but tungsten remains bright | Puddle or surface problem may be separate | Preparation, filler, gas, and process settings |
| Discoloration returns only in one torch position | Intermittent delivery or damaged equipment | Torch cable, hose, connections, and qualified service path |
Color is a clue, not a verdict. Gray tungsten does not prove a bad gas cylinder, and a bright electrode does not prove the weld is acceptable.
Make the test safe and controlled
Use the helmet shade, protective clothing, gloves, screens, ventilation, and respiratory controls required by the hazard assessment. Keep your head out of the plume. Position local exhaust to control fumes without pulling away the shielding envelope.
Remove or protect combustibles and follow the site’s hot-work permit and fire-watch program. Keep compressed-gas cylinders secured and away from damage and the electrical circuit. Do not use a flame to find a gas leak.
Before changing torch parts, switch off and disconnect the power source, close the cylinder as directed, and follow workplace energy-control procedures. Do not open the machine or repair gas or electrical equipment unless the manual permits it and you are qualified.
The welding safety essentials and hot-work permit checklist provide broader planning context; your employer’s program and applicable law control the job.
1. Rebuild a known baseline
Record the machine and torch model, process, polarity, tungsten, cup or gas-lens parts, stickout, gas, flow, post-flow, current, AC balance, and cooling method.
Compare every item with the exact power-source manual, torch diagram, consumable data, and approved WPS. Use the TIG tungsten selection and grinding checklist to prepare a verified clean electrode.
Make the test only on clean, representative practice material when the procedure permits it. Keep the original settings written down so each unsuccessful test can return to the same baseline.
2. Observe when the color appears
Run one short test without changing the setup. Keep the torch in its normal position over the end of the bead after the arc stops, and let the programmed gas cycle finish. Watch the tungsten through appropriate eye protection; do not lift the helmet into the arc area while radiation or hot metal remains a hazard.
- Darkens only after shutdown: go to the post-flow test.
- Darkens during the arc: skip to gas coverage and torch assembly.
- Changes immediately after contact: stop and remove the contaminated section as the electrode guidance requires.
- Changes shape rather than only color: check the electrical and thermal setup before making another arc.
3. Isolate post-flow and torch position
Post-flow is equipment-specific. The current Miller Maxstar 210 manual’s troubleshooting table lists increased post-flow time when a tungsten oxidizes and does not remain bright after welding; the Lincoln Square Wave TIG 200 table connects oxidation after welding with inadequate continued shielding. Neither is a universal setting.
Verify that gas continues at the cup after the arc stops. Repeat while keeping the cup over the weld until flow ends; do not wave the torch outside the shielding zone.
If the tungsten now stays bright, torch movement—not gas quantity—was the isolated variable. If it still darkens, change the post-flow only within the manual or WPS range and repeat. If the actual flow stops early despite the programmed setting, use the manufacturer’s service route.
4. Prove gas delivery before changing flow
Confirm the cylinder label and gas match the documented GTAW setup; never rely on cylinder color. Check the valve, regulator or flowmeter, hose, connections, and torch, then verify delivery by the approved method.
Miller notes that both inadequate flow and excessive, turbulent flow can reduce coverage. Restore the documented baseline, then change flow by one permitted increment only after ruling out restrictions, an empty cylinder, and incorrect gas.
The shielding-gas guide explains gas selection. This diagnostic is about preserving the specified gas from cylinder to hot tungsten.
5. Remove drafts without removing ventilation
Close an open door, shield the test from cross-drafts, and note the positions of fans and extraction hoods. Repeat at the same setting. If the fault follows air movement, redesign the shielding and fume-control arrangement with a competent person rather than simply switching off ventilation.
6. Inspect the torch as a system
With the equipment isolated and cooled, compare the cup, gas lens or collet body, collet, heat shield, back cap, seals, electrode, and assembly order with the torch diagram. Look for cracks, damage, wrong-size parts, displaced seals, loose connections, or a pinched hose.
Reassemble as instructed, set cup size, stickout, and angle from the torch manual or WPS, then repeat. A fault that follows cable or torch position calls for service.
Stop using the system if a leak is suspected but cannot be safely isolated, a hose or cable is damaged, a connection overheats, gas delivery is intermittent, or the regulator or cylinder appears defective. Contact the equipment service provider or gas supplier as appropriate.
7. Check polarity, current, balance, and cooling
If the tip also balls excessively, retreats, splits, or melts, compare polarity and current-related settings with the machine manual. Verify tungsten alloy and diameter against the full cycle, including pulse peak and sustained arc time.
On AC, use the power-source guidance for balance and tip preparation. On DC, confirm the required polarity rather than applying a remembered rule to an unfamiliar process. Also verify torch duty rating and coolant circulation where applicable.
For aluminum, keep the full process decision on the aluminum TIG welding guide. Black deposits in an aluminum puddle, excessive electrode balling, and a tungsten that oxidizes after shutdown are different symptoms even when they occur together.
8. Remove contact contamination completely
A dip into the puddle or a filler-rod touch can leave visible metal on the electrode and destabilize the next arc. Stop rather than trying to burn it clean. Let the torch cool, remove the tungsten as instructed, and grind far enough behind the affected area or replace it according to the electrode guidance and WPS.
If contamination recurs without contact, inspect joint cleanliness, filler handling, and shielding rather than repeatedly sacrificing electrodes.
Record the one-change test
| Test | Single condition changed | When color appeared | Tungsten/tip result | Weld result | Keep or restore? |
|---|---|---|---|---|---|
| Baseline | None | During / after / contact | Reference | ||
| 1 | |||||
| 2 |
Photograph each result after the same cooling interval. Restore the baseline after a failed test so stacked adjustments do not hide the cause.
Next step: qualify the correction, not the color
Once the tungsten remains stable, prepare a fresh representative coupon and apply the specified visual, dimensional, destructive, or nondestructive acceptance criteria. Use the common welding defects guide to name visible symptoms, but do not approve a weld by tungsten color or bead appearance alone.
For structural, pressure, aerospace, vehicle, lifting, sanitary, or other failure-critical work, stop production after unexplained contamination. Follow the governing WPS, quality plan, traceability rules, and qualified-personnel requirements. The WPS, PQR, and welder qualification guide explains which record controls the production variables and acceptance path.
Sources and scope
- Miller: Guide to TIG welding basics and troubleshooting
- Miller: Common TIG welding problems
- Miller Maxstar 210 owner’s manual
- Lincoln Electric Square Wave TIG 200 operator’s manual
- OSHA: Arc welding and cutting, 29 CFR 1926.351
- OSHA: Fire prevention, 29 CFR 1926.352
- OSHA: Welding ventilation and protection, 29 CFR 1926.353
Manufacturer documents, safety rules, codes, and approved procedures can change. Use the editions and requirements that apply to the exact equipment, worksite, jurisdiction, material, and weld.

The Welder's Guide Editorial Team
Independent trade-focused editorial team