Some links on this site are affiliate links. We may earn a commission at no cost to you. Learn more.
How to Read Welding Blueprints and Symbols

How to Read Welding Blueprints and Symbols
Welding blueprints are the universal language between engineers, designers, and welders. If you cannot read them, you are guessing at what needs to be done — and guessing on a structural weld is dangerous. The American Welding Society (AWS) standardized welding symbols provide all the information you need to execute a weld correctly: type, size, length, location, and process.
This guide teaches you how to read and interpret welding symbols and blueprints from the ground up.
The Basics of Blueprint Reading
Before diving into welding symbols specifically, understand the fundamentals of technical drawings:
Views
- Orthographic projection — Most blueprints show three views: front, top, and right side. Together, these three views describe a three-dimensional object completely.
- Isometric view — A three-dimensional representation that helps visualize the finished part. Often included as a reference.
- Section views — A cutaway view showing internal features. Indicated by section lines with arrows showing the cutting plane direction.
Scale
Blueprints are drawn to scale, meaning the drawing is a proportional representation of the actual part. Common scales include 1:1 (full size), 1:2 (half size), and 1:4 (quarter size). Always check the scale in the title block before taking measurements from the drawing.
Lines and Their Meanings
- Solid thick lines — Visible object edges
- Dashed lines — Hidden features not visible from the current view
- Center lines — Alternating long and short dashes indicating the center of symmetry
- Dimension lines — Thin lines with arrows showing the extent of a measurement
- Extension lines — Connect the feature being dimensioned to the dimension line
Anatomy of a Welding Symbol
AWS welding symbols follow a specific structure. The basic reference system consists of:
- Reference line — The horizontal line that all other elements connect to. Information above the line applies to the other side of the joint; information below the line applies to the arrow side.
- Arrow — Points to the joint or location where the weld is to be placed.
- Tail — An optional fork at the opposite end of the reference line. Used for specifications, process, or other references.
        [Other side info]
─────────────────────────  ← Reference line
        [Arrow side info]
    \────→                   ← Arrow pointing to joint
         ╲
          [Tail (optional)]
Understanding which side of the reference line to read is critical. The arrow side is always the side the arrow physically touches. The other side is the opposite face of the joint.
Basic Weld Symbols
Each weld type has a specific symbol shape that sits on the reference line:
Fillet Weld
A right triangle pointing down. The vertical leg of the triangle always faces left. This is the most common weld symbol you will encounter.
Groove Welds
- Square groove — Two parallel vertical lines
- V-groove — A V shape opening upward
- Bevel groove — A single diagonal line (like half a V)
- U-groove — A U shape opening upward
- J-groove — A half-U shape (like half a U)
Plug and Slot Welds
A rectangle (plug) or elongated rectangle (slot) placed below the reference line.
Surfacing Weld
Two curved lines stacked horizontally, representing a buildup of material on the surface.
Back and Backing Welds
A semicircle on the reference line. A back weld is made after a groove weld from the opposite side. A backing weld is made first to support the groove weld.
Spot and Projection Welds
A circle placed on the reference line. Spot welds join overlapping pieces at a point. Projection welds use a raised dimple on one piece to localize the weld.
Supplementary Symbols
Supplementary symbols modify the basic weld symbol with additional requirements:
Weld All Around
A circle at the intersection of the reference line and the arrow. Indicates the weld continues all the way around the joint (360 degrees). Common on pipe-to-flange connections and round structural members.
Field Weld
A filled-in flag at the intersection of the reference line and the arrow. Indicates the weld is to be made in the field (on-site) rather than in the shop. Helps the fabricator know which welds are their responsibility versus the erector’s.
Melt-Through
A filled-in semicircle on the other side of the reference line. Indicates that complete joint penetration is required with visible root reinforcement on the back side.
Contour Symbols
Flat, convex, or concave lines added above the basic weld symbol to specify the desired weld face profile:
- Flat contour — A straight horizontal line above the symbol
- Convex contour — A curved line bowing upward above the symbol
- Concave contour — A curved line bowing downward above the symbol
When a finishing method is required, a letter is added:
- G — Grinding
- M — Machining
- C — Chipping
- R — Rolling
- H — Hammering
Backing Symbol
A rectangle on the other side of the reference line indicating a backing strip or ring is required. The backing material and dimensions are specified in the tail or a note.
Dimensioning Welds
Dimensions on welding symbols follow specific placement rules:
Fillet Weld Dimensions
- Size — Placed to the left of the weld symbol. For a 3/8-inch fillet weld, the number 3/8 appears left of the triangle.
- Length — Placed to the right of the weld symbol. If no length is specified, the weld runs the full length of the joint.
- Pitch (spacing) — Placed to the right of the length, separated by a dash. For intermittent welds, the pitch indicates the center-to-center distance between weld segments. Example: 2-6 means 2 inches of weld every 6 inches on center.
Groove Weld Dimensions
- Root opening — Placed inside the groove symbol
- Groove angle — Placed inside or beside the groove symbol in degrees
- Depth of preparation — Placed to the left of the groove symbol
- Effective throat — Placed in parentheses to the left of the groove symbol when it differs from the depth of preparation
Multiple Weld Symbols
When a joint requires welds on both sides, both the arrow side and other side symbols appear on the same reference line. If both sides are identical fillet welds, the same triangle appears above and below the line.
For combinations (such as a fillet weld on one side and a groove weld on the other), each symbol occupies its respective position on the reference line.
Reading a Complete Weld Symbol: Step-by-Step
Follow this sequence when reading any welding symbol:
- Identify the arrow direction — Where is the joint?
- Check the reference line — Which information is arrow-side versus other-side?
- Read the basic weld symbol — What type of weld is required?
- Check dimensions — What is the size, length, and pitch?
- Look for supplementary symbols — All-around? Field weld? Contour requirements?
- Read the tail — Are there specific process, electrode, or specification requirements?
- Check notes — Referenced general notes may apply to the weld.
Common Blueprint Abbreviations
| Abbreviation | Meaning |
|---|---|
| TYP | Typical — applies to all similar features |
| SF | Shop fabricated |
| FF | Field fabricated |
| CJP | Complete Joint Penetration |
| PJP | Partial Joint Penetration |
| WPS | Welding Procedure Specification |
| NDE / NDT | Non-Destructive Examination / Testing |
| VT | Visual Testing |
| MT | Magnetic Particle Testing |
| UT | Ultrasonic Testing |
| RT | Radiographic Testing |
| PWHT | Post-Weld Heat Treatment |
Practical Tips for Blueprint Reading
- Start with the title block — It contains the drawing number, revision, scale, and material specifications.
- Read the general notes first — These apply to all welds on the drawing unless overridden by a specific symbol.
- Use a straightedge — When dimensions are unclear, align your eye with a ruler to trace lines to their references.
- Ask questions — If a symbol is unclear, ask the engineer or project manager. Never assume.
- Carry a reference chart — Keep an AWS welding symbol reference card in your toolbox for quick lookup.
Final Thoughts
Reading welding blueprints is a skill that improves with practice. Start by learning the basic weld symbols — fillet, V-groove, and bevel groove cover the vast majority of what you will see. Then gradually add supplementary symbols and dimensioning to your knowledge. Before long, you will read a welding symbol as naturally as you read words on a page, and your work will be more accurate and efficient because of it.
Related Articles
Blueprints specify joint types and their geometry — the welding joint types guide explains each of the five basic joint configurations, their preparation requirements, and how they relate to the groove and fillet weld symbols you will encounter on drawings. Blueprints also specify welding positions, so understanding the welding positions guide helps you interpret position requirements like 3G or 4G that may appear in the WPS referenced on a drawing. For structural steel work following AWS D1.1, the how to pass a welding certification test guide explains how blueprints and WPS documents are used during qualification testing.

Frank Ciervo
Certified Welder & Founder of The Welder's Guide
Get our free Welding Safety Checklist — delivered to your inbox.
No spam. Unsubscribe anytime.
Recommended Product
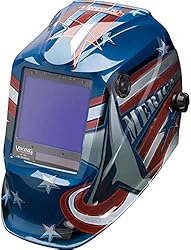
Lincoln Electric Viking 3350 Auto-Darkening Helmet
A premium auto-darkening welding helmet with 1/1/1/1 optical clarity, 4C lens technology, and a wide viewing area. Comfortable for all-day use.
- ✓ 4C lens technology
- ✓ 1/1/1/1 optical clarity
- ✓ Wide 12.5 sq in view
- ✓ Grind mode
As an Amazon Associate, we earn from qualifying purchases.
Get Your Free Welding Safety Checklist
Join thousands of readers. Expert tips and guides delivered to your inbox — no spam, ever.
No spam. Unsubscribe anytime. View our Privacy Policy.
Affiliate Disclosure
Some of the links on this page are affiliate links. If you click on one of these links and make a purchase, we may receive a small commission at no additional cost to you. This helps support our site and allows us to continue providing free content.
We only recommend products we believe in. All opinions are our own. We are a participant in the Amazon Services LLC Associates Program, an affiliate advertising program designed to provide a means for us to earn fees by linking to Amazon.com and affiliated sites.