Some links on this site are affiliate links. We may earn a commission at no cost to you. Learn more.
How to Weld a Roll Cage: DOM Tubing, Notching, and Certification

How to Weld a Roll Cage: DOM Tubing, Notching, and Certification
A roll cage is one of the most important welds a fabricator makes. It is the last line of defense between a driver and catastrophic injury in a crash. Done correctly, a roll cage saves lives. Done incorrectly, it provides false security — a cage that collapses in a rollover is worse than no cage at all.
This guide covers roll cage construction from tube selection through final inspection, including what sanctioning bodies require and how to produce welds that meet those standards.
Understanding Roll Cage Regulations
Before cutting a single tube, obtain the current rulebook from your sanctioning body. Rules vary significantly and are updated regularly.
Common sanctioning bodies and their rulebooks:
- NHRA (drag racing) — publishes annual rulebook with cage specifications by car class and ET
- NASA (road racing) — Improved Touring and Time Trial rules
- SCCA (road racing) — Fastrack and individual category supplements
- SCORE/BITD (off-road) — desert racing rules
- PRI/local tracks — vary widely
Key specifications in any rulebook include:
- Minimum tubing OD and wall thickness by vehicle weight and roll cage type
- Minimum and maximum bend radii
- Required cage members (main hoop, front hoop, door bars, harness bar, bracing)
- Material specifications — DOM or ERW, 1020/1025 or 4130 chromoly
- Weld inspection requirements
Do not skip this step. A cage built to incorrect specs may be rejected by tech inspection and require complete reconstruction.
Tubing Selection: DOM vs. ERW vs. 4130 Chromoly
DOM (Drawn Over Mandrel) — The Standard Choice
DOM tubing is the most common choice for street-legal roll cages and many motorsport applications. It is:
- Manufactured from 1020 or 1025 low-carbon steel
- Drawn over a mandrel to produce a very consistent wall thickness
- Has a welded seam (not seamless), but the seam is processed to be nearly invisible
- Readily MIG or TIG welded without preheat
- Less expensive than chromoly
Most sanctioning bodies accept DOM tubing for their base roll cage requirements. It is the default choice for most amateur motorsport fabricators.
ERW (Electric Resistance Welded)
ERW is less expensive than DOM but has an internal seam bead and less consistent wall thickness. Some sanctioning bodies prohibit ERW in roll cages. Check your rulebook before using ERW.
4130 Chromoly
4130 chromoly steel offers higher strength than DOM at the same wall thickness, allowing lighter cage construction. However:
- Requires TIG welding (MIG on chromoly requires pre-qualification testing in some applications)
- Needs stress relief or normalization after welding for some applications
- More expensive than DOM
- Required (or strongly recommended) by some NHRA classes
For most amateur motorsport cages: DOM is the standard. For professional/high-performance applications: 4130 chromoly is preferred.
Common Tubing Specifications
| Application | Typical OD | Typical Wall |
|---|---|---|
| Auto-cross / HPDE | 1.5” | 0.120” |
| Road racing (light car) | 1.5” | 0.120”–0.134” |
| Road racing (heavy car) | 1.75”–2” | 0.120”–0.134” |
| Drag racing (street) | 1.5”–1.75” | 0.120” |
| Off-road | 1.75”–2” | 0.120”–0.180” |
Tools Required for Roll Cage Fabrication
Tube Notcher — The Most Critical Tool
A tube notcher cuts the coped end of one tube to mate precisely with the OD of another. Tight-fitting joints are essential for roll cage integrity — gaps in joints create stress risers and reduce weld quality.
Types of notchers:
- Hole-saw notcher — Uses a bi-metal hole saw to cope the end of the tube. Adjustable angle capability is important for compound angles. Pro-Tools 105 Notcher is a popular option.
- Plasma cutter notcher — Uses plasma cutting jigs for complex angles. Less common in home shops.
- Grinder (manual) — For experienced fabricators, an angle grinder can cope ends after marking with a template. Slow and requires skill.
Tube Bender
A hydraulic tube bender with properly sized dies is required for making bends without wall thinning or collapse. Round tube bending requires a die matched to the tube OD.
Recommended: JD Squared Model 32 tube bender is the standard for home shop and light professional fabrication.
Additional Tools
- Welding table or fixture table
- Framing square and tape measure
- Tube measuring and marking tools (wrap-around template)
- Angle finder
- Level
- Die grinder for cleanup
MIG vs. TIG for Roll Cage Welding
Both processes are used for roll cages. The choice depends on material, application, and welder skill.
MIG Welding Roll Cages
MIG welding DOM tubing is accepted by most sanctioning bodies for amateur motorsport classes. MIG welding is:
- Faster than TIG for the same weld length
- Easier to learn to an acceptable standard
- Appropriate for DOM tubing in most amateur applications
Use: ER70S-6, 0.030”–0.035” wire, 75/25 Ar/CO2 shielding gas.
MIG welded joints should be fully penetrated with no porosity, undercut, or visible cold lap. Visual inspection by a certified chassis inspector is common in sanctioned racing.
TIG Welding Roll Cages
TIG welding produces the cleanest, most consistent welds and is required or strongly preferred for:
- 4130 chromoly tubing
- NHRA-sanctioned drag cars in professional classes
- Any application where weld quality is scrutinized by inspectors
- High-performance road racing
TIG welding roll cages requires the ability to weld in all positions — flat, horizontal, vertical, overhead — and to maintain consistent bead width and penetration. This is a professional-level skill.
Use: ER70S-2 for DOM steel, ER80S-D2 for 4130 chromoly. Argon shielding.
Planning the Cage
Before cutting, build the cage in software or on paper first. Key dimensions:
- Main hoop position — Directly behind the driver’s seat, as close to the body as clearance allows (typically within 6 inches per most rulebooks)
- Main hoop height — Minimum 2 inches above helmet with driver seated and belted
- Front hoop — Along the A-pillar, windshield frame, or firewall per rulebook specification
- Lateral bracing — Door bars or intrusion bars on driver side (and passenger side in multi-class categories)
- Diagonal brace — X-brace in the main hoop or roof area for roll rigidity
- Harness bar — Horizontal bar across the cage at shoulder level for four-point and multi-point harness mounting
Measure your specific car interior carefully. Roll cages are custom-fitted to each chassis — there are no universal dimensions.
Welding Procedure for Roll Cage Joints
Joint Preparation
- Notch carefully — A perfect notch allows the tube end to sit flush against the mating tube with zero gap. Even a small gap (over 1/16”) weakens the joint.
- Deburr the notched end with a file or die grinder. Remove all sharp edges.
- Clean both surfaces with acetone or lacquer thinner immediately before welding.
- Dry-fit the joint before tacking. The tube should sit flush with no rocking.
Tacking
Tack weld at 3–4 equally spaced points around the joint circumference. After each tack, verify the angle has not shifted.
Full Welding
Run the full weld around the joint circumference in segments. For MIG:
- Position the gun at 10–15 degrees drag angle
- Maintain consistent arc length and travel speed
- Complete the weld in overlapping segments (start each new segment on top of the previous tack)
For TIG:
- Use a foot pedal to modulate amperage at joint transitions
- Maintain a short arc length
- Add filler smoothly and consistently — “dipping” should be even
Weld Quality Requirements
Roll cage welds must pass visual inspection. Rejectable conditions include:
- Undercut at the toe — weakens the base metal
- Porosity — visible pits or holes in the bead
- Cold lap — weld bead rolled onto base metal without fusion
- Incomplete fusion at the joint root
- Cracks — any visible cracking requires complete weld removal and repair
Bracing and Gussets
Properly braced cages distribute loads through the entire structure. Required bracing varies by rulebook, but commonly includes:
- Diagonal brace in the main hoop (corner to corner)
- Door bars (minimum of two per side for road racing)
- Foot box protection bars
- Harness mounting bar
- Gussets at the base of the main hoop where it attaches to the floor
Gussets at floor mounting points are particularly important — this is where the cage transfers rollover loads to the chassis. Use minimum 1/8-inch plate gussets welded both to the cage tube and the chassis.
Inspection and Certification
Tech Inspection
Sanctioned racing events conduct technical inspection of roll cages. Inspectors check:
- Cage mounting and tube dimensions
- Weld quality (visual inspection)
- Driver clearance
- Required cage members per rulebook
Bring your rulebook to inspection. Inspectors are enforcing the rulebook, not their personal opinions.
Professional Certification
For NHRA-certified cars and other professional requirements, cage inspection may require a certified chassis fabricator to sign off. In some NHRA classes, the cage must be built by a certified shop.
The NHRA rulebook is the authoritative source for drag racing certification requirements.
Cost of Materials for a Basic Cage
| Item | Approximate Cost |
|---|---|
| DOM tubing (1.5” x 0.120”, 40 ft) | $120–$180 |
| Mounting plates and gusset material | $40–$60 |
| Consumables (wire, gas, grinding discs) | $30–$50 |
| Total materials | $190–$290 |
Labor (if hired out) adds $800–$3,000+ depending on cage complexity and fabricator rate.
Building a roll cage is serious work that requires fabrication skill, proper tools, and thorough knowledge of applicable rules. If you are new to roll cage construction, work alongside an experienced fabricator for your first build. The learning experience is invaluable, and the safety of the driver depends on getting it right.

The Welder's Guide Team
Certified Welder & Founder of The Welder's Guide
Get our free Welding Safety Checklist — delivered to your inbox.
No spam. Unsubscribe anytime.
Recommended Product
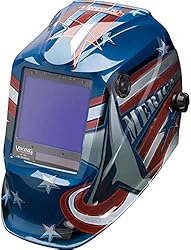
Lincoln Electric Viking 3350 Auto-Darkening Helmet
A premium auto-darkening welding helmet with 1/1/1/1 optical clarity, 4C lens technology, and a wide viewing area. Comfortable for all-day use.
- ✓ 4C lens technology
- ✓ 1/1/1/1 optical clarity
- ✓ Wide 12.5 sq in view
- ✓ Grind mode
As an Amazon Associate, we earn from qualifying purchases.
Get Your Free Welding Safety Checklist
Join thousands of readers. Expert tips and guides delivered to your inbox — no spam, ever.
No spam. Unsubscribe anytime. View our Privacy Policy.
Affiliate Disclosure
Some of the links on this page are affiliate links. If you click on one of these links and make a purchase, we may receive a small commission at no additional cost to you. This helps support our site and allows us to continue providing free content.
We only recommend products we believe in. All opinions are our own. We are a participant in the Amazon Services LLC Associates Program, an affiliate advertising program designed to provide a means for us to earn fees by linking to Amazon.com and affiliated sites.