Some links on this site are affiliate links. We may earn a commission at no cost to you. Learn more.
Best Welding Carts and DIY Plans for Your Shop

Best Welding Carts and DIY Plans for Your Shop
A welding cart is one of the most practical shop upgrades you can make. Without one, your welder sits on the floor or a workbench, the gas cylinder is leaned against a wall (a safety hazard), cables tangle, and moving everything requires multiple trips. A good cart consolidates your machine, cylinder, cables, and accessories into one portable unit.
You have two options: buy a pre-built cart or build your own. Both approaches have merit — this guide covers the best in each category.
What Makes a Good Welding Cart?
Before buying or building, consider these factors:
Stability: The cart must support a welder (15–40 lbs) plus a full cylinder (100–150 lbs for an 80 cu ft tank) without tipping. Wide wheelbase and low center of gravity are essential.
Cylinder chain: All welding carts must have a cylinder retaining chain or bracket. A cylinder falling and breaking the valve is a life-threatening hazard. This is not optional.
Cable management: Dedicated hooks or holders for the welding leads, ground cable, and hose prevent tangles and damage.
Shelf space: You need room for the welder, wire spools, accessories, and tools. Look for a lower shelf in addition to the main deck.
Wheel quality: Pneumatic (air-filled) wheels handle uneven shop floors and thresholds better than solid rubber. At minimum, use large-diameter solid wheels (6-inch or larger).
Weight capacity: Ensure the cart’s rated capacity exceeds your welder + cylinder + accessories weight.
Best Pre-Built Welding Carts
1. Lincoln Electric K520 — Best Heavy-Duty Cart
Price: ~$170 | Lincoln Electric K520
Lincoln’s K520 is the benchmark for commercial welding carts. Heavy 12-gauge steel construction, reinforced deck, and a sturdy cylinder retaining chain. The extended lower shelf accommodates large wire spools and accessories. Fits most Lincoln MIG and multi-process welders.
Specs:
- Load capacity: 300 lbs
- Dimensions: 18” W x 34” L x 36” H
- Wheels: 8-inch pneumatic
- Cylinder capacity: Holds one standard gas cylinder
What we like:
- Industrial-grade construction
- 8-inch pneumatic wheels roll smoothly over cords and thresholds
- Generous lower shelf
- Cylinder safety chain included
What we don’t like:
- Some assembly required
- Fits Lincoln welders best — may not suit other brands perfectly
Best for: Home shops and light commercial use with Lincoln welders.
2. Hobart 770502 — Best Value Cart
Price: ~$130 | Hobart 770502
Hobart’s welding cart is a solid value option. Heavy-gauge steel, 8-inch wheels, dual-cylinder capacity, and hooks for cables. Slightly less robust than the Lincoln K520 but adequate for home shop use.
What we like:
- Can accommodate two cylinders (useful for dual-shield MIG or TIG setups)
- Lower price than Lincoln
- Includes cable management hooks
- 8-inch wheels
Best for: Home shop welders using Hobart or other brand machines.
3. Ironton Steel Welding Cart — Best Budget Option
Price: ~$80 | Ironton Welding Cart
The Ironton cart from Northern Tool is the best option for welders on a tight budget. Lighter-gauge steel but adequate for home shop loads. Solid 6-inch wheels (not pneumatic) and a cylinder chain are included.
What we like:
- Excellent price
- Adequate for home shop use
- Cylinder chain included
What we don’t like:
- Solid wheels (not pneumatic) — rougher on uneven surfaces
- Lighter gauge steel — less durable long term
Best for: Beginning welders, light-duty use, tight budgets.
4. Klutch Welding Cart — Best Feature Set for the Price
Price: ~$120 | Klutch Welding Cart
The Klutch cart from Northern Tool offers a rear-tilt design that makes loading heavy welders easier, plus integrated cable hooks, a wire spool holder, and a lower shelf with dividers. At $120, it packs more features than the competition at this price.
What we like:
- Rear-tilt loading assist
- Wire spool holder built-in
- Organized lower shelf
- Good cable management
Best for: Welders who want more organization features without building their own cart.
DIY Welding Cart: Build Your Own
Building your own welding cart from steel square tube is one of the most satisfying beginner welding projects. The result is a custom cart sized exactly for your equipment, at lower cost than most pre-built options.
DIY Welding Cart Material List
This plan builds a cart approximately 18” wide x 36” long x 38” tall — sized for a standard MIG welder and one gas cylinder.
Steel:
- 1.5” x 1.5” x 1/8” wall square tubing — 40 feet (frame and legs)
- 1” x 1” x 1/8” angle iron — 20 feet (shelf supports and bracing)
- 3/16” flat plate — two pieces 15” x 18” (shelves)
Hardware:
- 4x heavy-duty 4-inch swivel casters (two with locks) — or 2x fixed + 2x swivel
- 1/4” x 1-1/4” chain — 4 feet (cylinder retaining chain)
- 2x screw eyes or chain hooks for cylinder chain
- 4x 1/4”-20 bolts and nuts for caster mounting
- Cable management hooks (bent from 1/4” rod or purchased)
Finish:
- Rust converter or self-etching primer
- Black enamel or epoxy paint
Estimated cost: $80–$120 in steel and hardware
DIY Welding Cart Cut List
Legs (4 pieces): 1.5” x 1.5” square tube, 30” long Top frame long sides (2 pieces): 1.5” x 1.5” square tube, 36” long Top frame short sides (2 pieces): 1.5” x 1.5” square tube, 15” long Bottom shelf frame long sides (2 pieces): 1.5” x 1.5” square tube, 30” long Bottom shelf frame short sides (2 pieces): 1.5” x 1.5” square tube, 15” long Cross braces (2 pieces): 1” x 1” angle iron, 15” long Cylinder holder upright: 1.5” x 1.5” square tube, 24” long
Step-by-Step Build Instructions
Step 1 — Cut all material to the cut list dimensions. Use a metal chop saw or angle grinder with a cutting disc. Deburr all cuts.
Step 2 — Build the top frame. Lay the two 36-inch side pieces parallel on a flat surface (or your welding table), 15 inches apart. Tack the two 15-inch end pieces to connect them at right angles. Check square with a framing square. Weld fully after confirming square.
Step 3 — Attach legs. Stand four legs at the corners of the top frame, inside the frame corners. Tack all four, then check for plumb and level before welding fully. Work diagonally — weld one corner, then the opposite corner — to minimize distortion.
Step 4 — Build the bottom shelf frame. Repeat Step 2 for the lower shelf frame, positioned 8 inches from the floor. Tack to the inside of the legs.
Step 5 — Add cross bracing. Weld diagonal cross braces on the sides or back of the cart for rigidity. A single X-brace on each side panel dramatically stiffens the frame.
Step 6 — Weld shelf plates. Drop the 3/16” flat plates into the top and bottom frames. Tack in place, then weld continuously around the perimeter.
Step 7 — Cylinder holder. Weld a vertical post on the right rear corner of the cart, extending 24 inches above the top shelf. Weld a chain anchor (screw eye or flat tab) at the top of the post and at the top shelf level. The cylinder will stand behind the post with the chain looped around it.
Step 8 — Caster mounting plates. Weld 3/16” x 3” x 3” plates to the bottom of each leg. Drill and bolt casters to these plates.
Step 9 — Cable hooks. Weld short hooks (bent 1/4” rod) to the side of the cart for MIG lead, ground cable, and torch hose.
Step 10 — Finish. Grind all weld spatter, apply self-etching primer, and topcoat with black enamel.
Recommended Tools for the Build
- Lincoln Electric Easy MIG 140 — enough machine for the 1/8” wall tube
- DeWalt DWE402 angle grinder — cutting and grinding
- Framing square and magnetic welding clamps
- Bessey welding clamps for tacking the frame
Adding Wheels to the DIY Cart
Caster quality matters. Cheap import casters fail quickly under the weight of a welder and full cylinder. Use:
- Wheels: 4-inch to 6-inch diameter minimum
- Rating: Each caster should be rated for at least 200 lbs
- Swivel casters with locks on the front two; fixed casters or swivel-lock on the back
The Shepherd Casters 4” Swivel Plate Casters (set of 4 including two with brakes) are reliable and widely available.
Cylinder Safety: The Non-Negotiable Rule
Whether you buy or build a welding cart, the cylinder must always be chained or otherwise secured to prevent tipping. A compressed gas cylinder that falls and shears its valve becomes a rocket. This is not hyperbole — it has killed people.
Chain the cylinder to the cart at all times, even when the cylinder appears to be standing stably on its own. The chain anchor should be at approximately 2/3 of the cylinder height for optimal stability.
A properly organized welding cart — built or bought — makes every welding session more productive and your shop safer.

The Welder's Guide Team
Certified Welder & Founder of The Welder's Guide
Get our free Welding Safety Checklist — delivered to your inbox.
No spam. Unsubscribe anytime.
Recommended Product
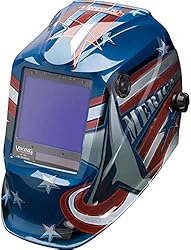
Lincoln Electric Viking 3350 Auto-Darkening Helmet
A premium auto-darkening welding helmet with 1/1/1/1 optical clarity, 4C lens technology, and a wide viewing area. Comfortable for all-day use.
- ✓ 4C lens technology
- ✓ 1/1/1/1 optical clarity
- ✓ Wide 12.5 sq in view
- ✓ Grind mode
As an Amazon Associate, we earn from qualifying purchases.
Get Your Free Welding Safety Checklist
Join thousands of readers. Expert tips and guides delivered to your inbox — no spam, ever.
No spam. Unsubscribe anytime. View our Privacy Policy.
Affiliate Disclosure
Some of the links on this page are affiliate links. If you click on one of these links and make a purchase, we may receive a small commission at no additional cost to you. This helps support our site and allows us to continue providing free content.
We only recommend products we believe in. All opinions are our own. We are a participant in the Amazon Services LLC Associates Program, an affiliate advertising program designed to provide a means for us to earn fees by linking to Amazon.com and affiliated sites.